REFERENCE :- http://www.c-sharpcorner.com/UploadFile/Roji.Joy/how-to-configure-search-centre-in-sharepoint-2013/
SharePoint Search Center site
- Verify that the user account that is performing this procedure is a member of the Farm Administrators group.
- On the home page of the Central Administration website, in the Application Management section, click Create site collections.
- On the Create Site Collection page, do the following:
- In the Web Application section, select a web application to contain the new site collection. To use a web application other than the one that is displayed, click the web application that is displayed, and then click Change Web Application.
- In the Title and Description section, in the Title box, type the name for the new Search Center site. Optionally, type a description in the Description box.
- In the Web Site Address section, for the part of the URL immediately after the web application address, select /sites/, or select a managed path that was previously defined, and then type the final part of the URL.
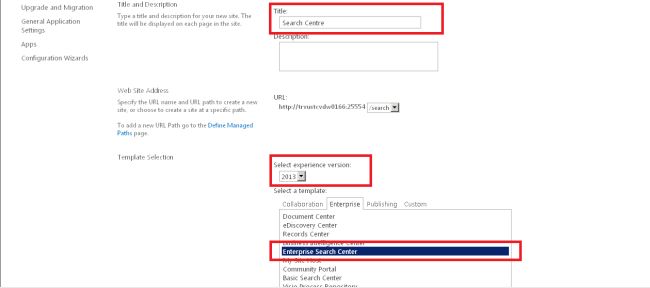
- In the Template Selection section, do the following:
- In the Select the experience version drop-down list, select 2013 to create a Search Center site that provides the SharePoint Server 2013 user experience, or select 2010 to create a Search Center site that provides the SharePoint 2010 Products user experience.
- In the Select a template subsection, click the Enterprise tab, and then do one of the following:
- If you are using SharePoint Foundation 2013, select the Basic Search Center template.
- Otherwise, if you are using SharePoint Server 2013, select the Enterprise Search Center template.
- In the Primary Site Collection Administrator section, in the User name box, type the user name of the primary site collection administrator for this site collection in the form domain\user name.
- In the Secondary Site Collection Administrator section, type the user name of a secondary site collection administrator in the form domain\user name.
- In the Quota Template section, select No Quota.
- A Search Center site is not intended to be a data repository. Therefore, you do not have to select a quota template.
- Click OK.
- On the Top-Level Site Successfully Created page, click the link to the Search Center site that you created.

- After you create the Search Center site, you must grant site access to users so that they can perform search queries and view search results. Use the following procedure to grant site access to users.
To grant access to the SharePoint Search Center
Use the following to grant access to the SharePoint Search Center:
- Verify that the user account that is performing this procedure is a member of the Owners group on the Search Center site.
- In a web browser, go to the Search Center site.
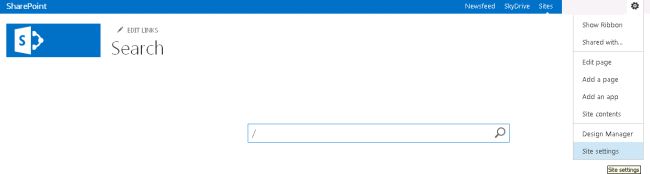
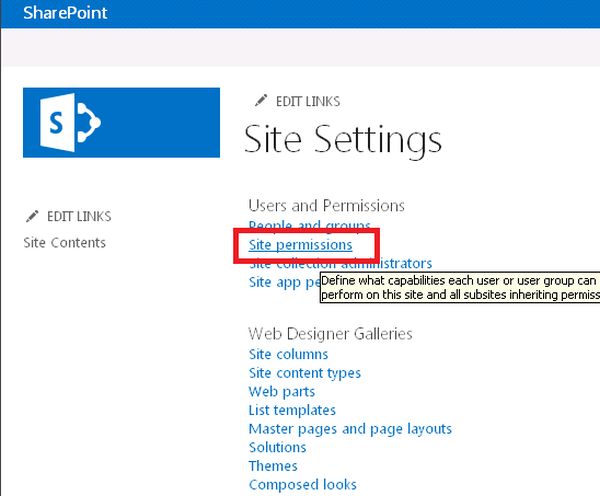
- Open the Site menu by clicking the gear icon in the upper-right portion of the page, and then click Site Permissions.
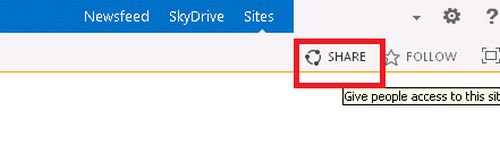
- In the Shared with dialog box, click Invite people.
- In the Share <SearchCenterName> dialog box, in the Enter users separated with semicolons text box, type the names of the Windows user groups and Windows users to whom you want to grant permissions for submitting queries and viewing search results in the Search Center.
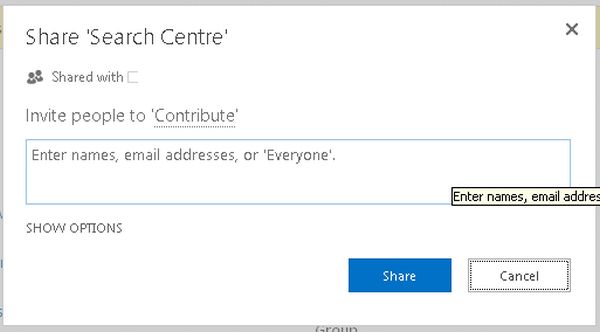
- For example, to grant access to the Search Center to all Windows users, type NT Authority\authenticated users.
- Click Show options.
- Clear the Send an email invitation check box.
- In the Select a group or permission level drop-down list, select <SearchCenterName> Visitors [Read].
- Click Share.

No comments:
Post a Comment